We seemed to have LOADS more Christmas cards this year than in previous years (my brain boggles at the weird reason for this when everyone seems to be sending less due to Eco issues, recession, etc.) To cut a long story short we ran out of the ribbon hangers that I had hand sewn very quickly in previous years and this year I decided that I wanted to do something a bit...nicer, I suppose. I had seen some lovely Scandi style felt ornaments around and decided to combine that look with my tried and true ribbon hanger method. I'm pretty pleased with the results.
WARNING!: Some of my photos feature Christmas tree tops and some feature Hearts because I made four hangers, two of each type.
Step 1:
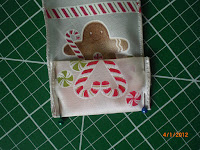
Choose, buy and cut your ribbon to length. I used pieces around 1.5m long (when finished) because it suits my room. Add 15cm to the final length that you want to have when they are finished to sew into the top of the hanger and to allow you to put weights in at the bottom. I found this really cute ribbon in 10 yard reels on sale at my local Garden Centre!
Step 2:
Find or draw the shapes that you want for the tops of the hangers and cut them out of paper to make templates. I drew the heart and cut it out myself but the Christmas tree is a piece of clip art that I pasted into MS Publisher, sized and printed out. Mine were approx 15 cm in diameter.
Step 3:
Fold your square of felt in half and pin the template to it. Make sure that you pin through both layers. Cut around the template using sharp fabric scissors. When you unpin afterwards you should have two identical pieces, a front and a back.
Step 4:
Using one of your felt pieces cut a length of ribbon or rat tail that is 20cm long. Sew the ends onto the inside of your shape using hand stitching. Make sure they are well secured because this is what the whole thing hangs from!
Step 5:
Pin the top end of your piece of ribbon to the back felt shape that you have just sewn the hanger to. and sew a square using the sewing machine. Be careful not to trap the hanging loop you have just made ( I learnt this the hard way). I used a square to give it some strength.
Step 6:
Next switch to the other piece of felt that will make the front of your shape. Inspired by Scandi style I embroidered patterns onto mine by hand using Anchor Cotton Perle and Fly Stitch. I learnt to do Fly stitch by Googling it and following instructions (never tried it before!). I chose to use Perle instead of Stranded Cotton because it was bolder and stood out from the background more in my view.
For the first hanger I made I drew the line that I wanted to follow on the felt using an air fading fabric marker but after I got the hang of it I didn't need to for the others.
Step 7:
Back to the ribbon. I wanted to weight the bottom of the ribbon so that it hung nicely and didn't move in the draughts very much. To do this I decided to use two pence pieces but washers or similar would do just as well.
I folded the end of the ribbon over and then over again to enclose the end, removed the coins and then pinned it in position. When sewing the pocket closed I sewed up one side, across the end and then raised the presser foot with the needle in situ to put the coins back in and sew the whole thing closed. (It took the tip of a pair of small scissors to push the coins into the pocket).
Step 8:
Pin the embroidered front of the felt onto the back and pin into position. Using Cotton Perle again and blanket stitch stitch around the edge until around half of it is enclosed. Using small pieces of stuffing and a knitting needle stuff the shape until it is plump, using the knitting needle to gently push the stuffing into corners etc.
Step 9:
You will need to change technique for the blanket stitch where it crosses the ribbon so that it continues to appear the same from the front. Finish blanket stitching around the edge, closing it completely and tie off securely.
You now have a finished card hanger, all you need are some miniature clothes pegs to suspend your cards with! Thank you for sticking with the tutorial. Constructive comments are always welcome.


2 comments:
welcome back to blogland nicki. That was a lot of work well done, as you know I love the hearts. . and the tree, just right for showing of your cards
Wonderful work and they look really effective.
Post a Comment